
How I got my blog setup(Hello World!)
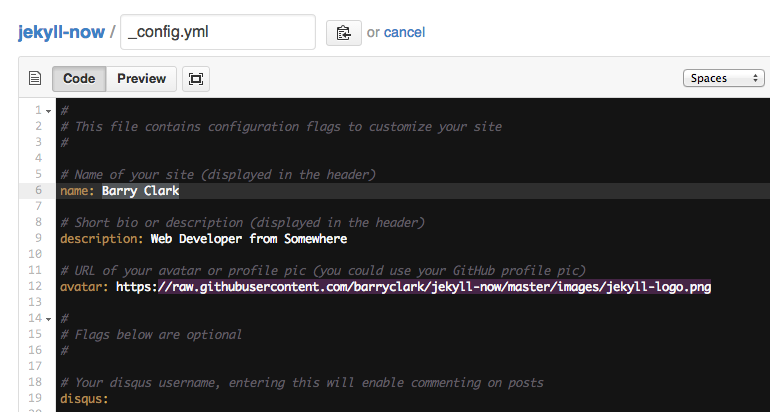
Next you can update your site name, avatar and other options using the _config.yml file in the root of your repository (shown below).
Why make a blog in the first place?
The whole idea of having a blog came to me when I was snooping around on Andrej Karpathy’s blog, and I realized that I really wanted one too.This, coupled with the fact that I would be joining no clubs for the coming year at IITM, meant that, I would have absolutely nothing to show for a 1 year gap. As I do not want to seem like an absolute loafer, starting a blog to document my adventures navigating the delightfully peculiar world of programming and computer science seemed to be a good idea.
Why now of all time?
I’m taking a course on machine learning off of youtube, but again, I was going to have no formal record of what I had learnt, so making the blog had to become a priority.
Stage 1
I decided to use making the blog to dip my toes into the world of full stack development, so I picked up a freeCodeCamp tutorial again off of youtube and started learning html. This was a bit of a waste, as I knew quite a lot of html from school but it was fun at the very least. I made a favicon in paint for the website which had everyone around me in the lab question my sanity :)
put image of favicon here
After about 2 hours of brain dead learning of html tags, I encountered a blinding flash of the obvious, I would have to pay for hosting whatever site I built. Having no intention of doing so, the hunt for a hacky slash way out of this situation began. Riffing off of Andrej Karpathy’s post , a decision was made, I would use a Jekyll based blog with GitHub pages for the lovely price of absolutely nothing. 3 hours of time had already passed, which seemed like an absolute waste, as I was nowhere close to having a functioning blog. Moreover, as one often encounters, I had had the misfortune of picking up a splitting headache during the time I spent clowning around with html.
Stage 2
By now, I had migrated from the CS DCF to CFI and was happily camped out on a table meant for a team dedicated to finding out whose rocket could go the highest, a rocket measuring contest, so to speak. With all of my aspirations of finishing off the blog that day seeming like a pipe dream, another roadblock appeared. Jekyll was written in Ruby, and to build the website , I would have to install it. Seems trivial, doesnt it? Easy peasy then, go to the website, download the installer, install, and BAM! You’re done! WRONG, Ruby doesn’t have native support for Windows which made me as apprehensive as a chicken on a farm who has just watched his ebest friend being gutted from head to toe, had his feathered plucked, and stuffed into an over for bigger beings with huge fat fingers to tear strips of his flesh,all while moaning their pleasure at this delectable offering. Where was I? Oh right, what happened next was as surprising as it was welcome, the (unsupported officially) Ruby installer for Windows worked like a charm, doing everything it had to do with suave class.
Stage 3
To add insult to injury, by this time, I had found this very helpful guide , which allowed you to directly fork the prebuilt blog by the website’s author, which saved me a whole lot of time. On the flip side, it made my whole mini freakout about Ruby lose its glimmer(see what I did there?). Took about half an hour to setup from there, and here we are now, you’re reading what will hopefully be the first of many to come posts.